

 THE CORRECT TEMPLATE FOR YOUR PRODUCT
Each graphic product will have a template that gives you the correct size to set your graphics at and gives you the amount of “bleed” that is needed for each side. Some templates will give you a file that you can use in your layout as a guide. Others will give you an image with dimensions along with a “safe visible area” for important content. Templates can be downloaded from the product page or contact one of our sale representatives.
VISIBLE AREA
This is the area of your graphic on the display that will show important text and images without being blocked by hardware, stitching, curves or whatever would block the visibility of important content. For example, one display may have a section that curves around to the back of the unit and you would not want important information showing there. Also be aware of anything that would block your display and it’s important content by sitting in front of it. For example, a standard table placed in front of a floor display may block the first 30” of your graphics. Another example would be a large monitor stand placed in front of your graphics.
BLEED
Bleed refers to the area that will be printed in your graphics but may not be seen because of trimming, stitching or hardware areas. Bleed is not always needed on all products or even on all four sides and varies depending on the product. Please follow template instructions and we would be happy to explain this in more detail.
 FILE SIZE & RESOLUTION
Basically, your graphic file should look ready to print when viewed at 100% of size. Resolution should be set at least at 100-120 DPI at 100%. This depends on the product being printed and some will require higher resolutions, but this is a good standard practice. If you need to make the image at 50% because of art board size constraints in Photoshop for example, then double the resolution to 200 DPI. At 25% size, you would have to double that again (400 DPI). When we preflight your graphics for printing and we see a potential resolution problem, we will usually send you screen shots at 100% for you to decide if the image quality is acceptable to you or not.
Most printing we do uses CMYK (Cyan, Magenta, Yellow, Black) as the color mode. If we receive files set up as RGB (Red, Green, Blue) then we have to change them to CMYK and this could result in a color shift. We also use the Pantone Matching System as a guide to help print certain colors correctly. If you have any critical colors in your art, please give us the (Solid) Pantone color for it if possible. Depending on the product we can print very close to these colors, but we do not guarantee a 100% match. A good rule of thumb if you have time, is to order a hard-copy proof, which is a print of a small piece of your graphics at 100% size using the printer that will do the final job. This allows you to accurately judge color in the final product.
GRAPHIC FILE TYPES
Photoshop (PSD) & Adobe Illustrator (AI, EPS) graphic files are preferred, as they are the most suitable for large format printing. This depends on the product, but we also may be able to use PDF (editable PDFs), JPG and TIFF files.
SUPPORT FILE
We need all support files you used in creating your art. This means send native files used to create EPS files, Photoshop files and embedded images.
We do not accept InDesign, Quark, CorelDraw, .gif, .doc, .ppt, and .indd files. Publisher, PowerPoint or Word documents can only work as a layout guide, but we cannot use them to print the final product. They would need to be redone in the proper file format (redesigned).
 IMPORTANT TIPS
1.Proofread your art Camelback Displays is not responsible for typos, errors, flaws or resolution problems contained in your art. Please check over your art before you send it to us and check over any proofs we send you. If something looks out of place, it is easier to fix it (and less expensive) before something is printed and shipped.
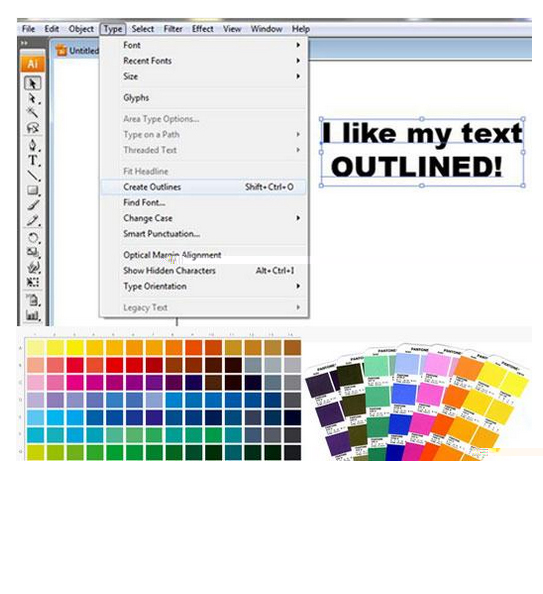
2.Do not include trimming or color guides in your file. We need clean graphic files that are ready to print. – Outline all of your text. We may not have the same font in our system that was used to create your art. This insures your text will be rendered just like you designed it. In Adobe Illustrator, select the text, click TYPE in your menu bar and select Create Outlines.
3.Provide Linked Files. When using images, provide those images as separate files. If the images are embedded, make sure the resolution is high enough at 100% and it’s still a good idea to send us the high resolution images just in case we need them.
4.Provide Pantone (PMS) colors for any critical colors in your design. Also, talk to us about your colors and order a hard-copy proof if possible.


 关闭返回
关闭返回